Acne is something that most people deal with at some point in their lives. It can be frustrating and embarrassing, but thankfully makeup can help. With the right techniques, you can cover up your acne and feel confident in your skin. In this article, we’ll walk you through step-by-step how to hide acne with makeup.
Step 1: Cleanse Your Skin
The first step in any makeup application is to have a clean canvas. Start by cleansing your skin with a gentle cleanser and patting it dry with a clean towel. This will help remove any excess oil or dirt from your skin, which can cause further breakouts.
Step 2: Prime Your Skin
Once your skin is clean and dry, it’s time to apply a primer. The primer will help create a smooth base for your makeup and help it stay on longer. Make sure to choose a primer designed for oily or acne-prone skin.
Step 3: Color Correct
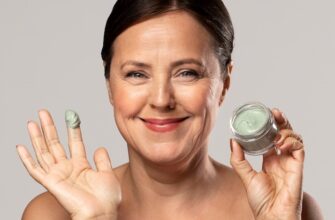
To cancel out any redness caused by your acne, use a color corrector. Green is the opposite of red, so use a green color corrector on any red or inflamed areas of your skin. Apply the color corrector with a small brush and blend it in using your fingertip.
Step 4: Conceal
Next, it’s time to conceal your acne. Choose a concealer that matches your skin tone exactly or use a slightly lighter shade to brighten up your skin. Use a small brush or your fingertip to apply the concealer directly onto your acne, blending it in gently until it disappears into your skin.
Step 5: Set with Powder
To set your concealer and prevent it from creasing or smudging, use a translucent setting powder. Use a large powder brush to sweep the powder over your entire face, focusing on the areas where you applied concealer.
Step 6: Apply Foundation
Now it’s time to apply foundation. Use a foundation that matches your skin tone exactly or choose a slightly lighter shade to brighten up your skin. Apply the foundation with a makeup sponge or brush, starting in the center of your face and blending it outward.
Step 7: Add Blush and Contour
To give your face some dimension and shape, use a blush and contour. Apply a small amount of blush to the apples of your cheeks and blend it upward. Then, use a contour powder or cream to sculpt your cheekbones, nose, and forehead.
Step 8: Finish with Setting Spray
The final step in any makeup application is to set it with a setting spray. This will help your makeup stay in place all day and prevent it from melting or smudging. Hold the setting spray a few inches from your face and spritz it all over.
FAQs
1. Is it okay to wear makeup if you have acne?
Yes, it’s perfectly okay to wear makeup if you have acne. Just make sure to choose products that are non-comedogenic and designed for acne-prone skin.
2. Should I use a brush or my fingers to apply concealer?
You can use either a brush or your fingers to apply concealer, but make sure to blend it in gently so it doesn’t look cakey or obvious.
3. Can I skip the primer?
We don’t recommend skipping the primer because it helps create a smooth base for your makeup and keeps it on longer.
4. Will setting spray make my skin oily?
No, setting spray shouldn’t make your skin oily. Make sure to choose a setting spray that’s designed for your skin type.
5. Can I use a setting powder that’s not translucent?
Yes, you can use a setting powder that’s tinted, but make sure it matches your skin tone and doesn’t look too obvious.
Conclusion
Acne can be frustrating, but with the right makeup techniques, you can cover it up and feel confident in your skin. Remember to cleanse your skin, prime it, color correct, conceal, set with powder, apply foundation, add blush and contour, and finish with setting spray. And don’t forget to choose products that are designed for your skin type and won’t clog your pores.


